Unreal Engine 5 – First impressions

On April 5, 2022, the Unreal Engine 5 was finally finally released as part of the “State of Unreal” presentation by Epic Games.
Before that, it was already possible to try out the functionality with the Early Access and Preview versions, but only for testing and not for use in real productions, since the stability was not yet guaranteed here.
Unreal Engine 5 can indeed be considered a milestone. It brings some new features that are not available anywhere else and enables completely new ways of dealing with content in the interactive real-time area.
You want to finally master the Unreal Engine professionally? You want to be part of an awesome community of realtime heroes? You have what it takes to be your own producer and director for your short film? The Connector offers you all that. The original from Epic Games!
Poster Features: Nanite and Lumen
Of course, the two “poster features” Nanite and Lumen are very prominent here. But first things first – this is actually about first impressions of the new software version – from the point of view of a user who has been using the Unreal Engine for about 7 years and has already experienced some changes. So the change from version 4 to 5 can be put into an appropriate context.
Unreal Engine: The history

When Unreal Engine 4 was released in March 2014, there was a different licensing model. You paid $19 (respectively 19€) per month to get access to the engine and its C++ source code on Github with an additional 5% royalty on product releases. A year later, in March 2015, the Unreal Engine was made available to all users for free. A huge step towards the democratization of game and real-time experience development. Further, the 5% licensing model remained in place, but only above a certain revenue threshold, which has been further adjusted over the years. Users who had previously paid monthly fees were credited with the cost in the form of Marketplace credits (a platform Epic Games had created to sell Unreal Engine specific products).
This was the first experience I had with a company of this size in this regard. Money that had been paid for the use of a software was refunded, despite usage.
Epic Games supports developers
This developer-friendly attitude runs through my entire experience with Epic Games – free use of assets from games that Epic Games has developed and not followed up on (Paragon), free monthly content in the Marketplace or content from new companies that Epic Games has bought in. The most prominent example would be Quixel with its almost endless library of high-quality photogrammetry models “Megascans”, which are available completely free of charge for Unreal Engine projects.
Review: The Unreal Engine 4
At the beginning of the Unreal Engine 4, the relationship to version 3 was still very noticeable. Some systems were more or less adopted, others were equipped with a new user interface. But just the basic approach of the engine to real-time graphics, the developer-friendly and especially 3D artist-friendly attitude of Epic Games is one of the many reasons that made the Unreal Engine so popular and successful.
With version 4, the Blueprint system was added. The ability to develop a complete game (or other interactive application) without ever writing a line of code is, of course, enormously attractive. Also, the introduction of PBR (physically based rendering) and the node-based, procedural approach to the material editor was a feature that immediately appealed to me.
Over the years, more and more functions were added, also thanks to the internal development of Fortnite, the extremely successful Battle Royale game from Epic Games. Every function that was needed for the game but did not yet exist was developed directly, because Fortnite brought with it a corresponding monetary success. Unreal Engine users profit indirectly from all these developments, because in later versions of the Unreal Engine these functions and improvements are then available to everyone.
Unreal Engine 5 – an overview

Back in the here and now, it’s fair to say that there’s hardly been as big a leap as from Unreal Engine 4 to Unreal Engine 5.
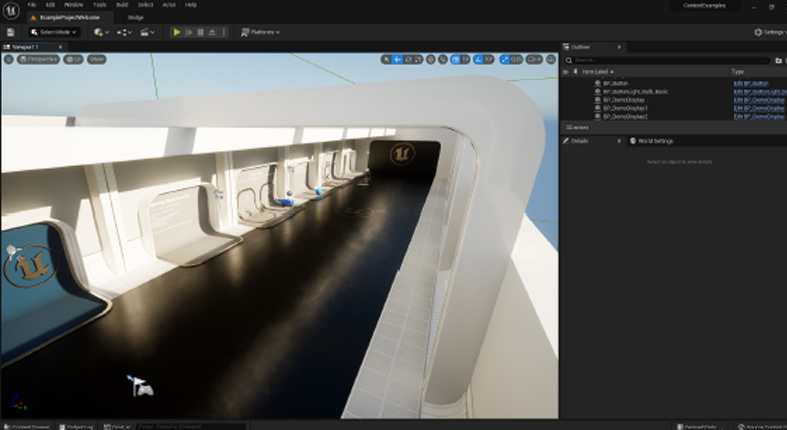
The user interface has been completely redesigned. Where noticeably no major changes took place since 2014, now a completely revised, restructured, clear and uniform user interface awaits. Of course, it is kept in dark colors by default, as it should be for the programming community that is used to “dark-mode”. However, it is still extremely flexible, so that there are hardly any limits to the layout, the window arrangement across several monitors, and the color scheme. The Content Browser, previously docked by default in the lower screen area, can now be opened via the keyboard shortcut “Ctrl+Space” and also hide it again. This way, the window is only in the screen area when you need it. It doesn’t waste any unnecessary screen area that you could fill with your 3D scene. A matter of habit, no question, and those who still prefer the docked version are of course still free to use that. Personally, I quickly noticed that it adds tremendous value. This also applies to other windows where the Content Browser was not available before, to be able to call it up easily and quickly. For example, in the Material Editor to quickly throw in a few textures, or in the UMG Editor to implement a sub-widget in a master widget. I wouldn’t want to miss that anymore.
In the bonus part you will learn how to determine the hex code for a color.
The Quixel Bridge is part of the UE5
The Quixel Bridge, a library management program for the Quixel Megascans with direct connection to the Unreal Engine via plugin, is now a direct part of the engine. Previously it was an external application. Now you simply öffnet another engine window, which you can either dock into your layout or place floating on the screen. Also, the ability to drag and drop assets directly from the Quixel library into your 3D scene is a welcome feature that makes the workflow much easier.
Nanite: 3D geometry in real time

In connection with this, Nanite must be mentioned. Nanite is a completely new way of dealing with static 3D geometry in real time. Where before objects with several millions of polygons would have been unthinkable in real time, you can now “bombard” the engine with polys without even breaking a sweat. The whole thing works based on so-called “virtual geometry”.
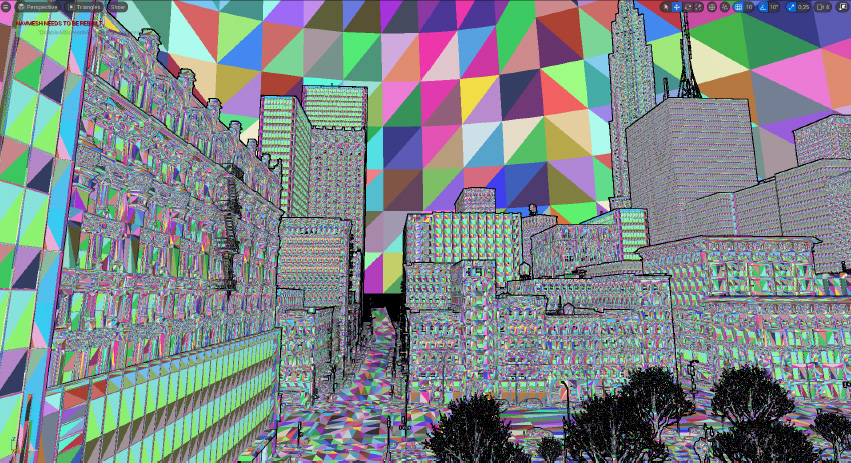
The polygons of an object are bundled into “clusters” and rendered on the screen depending on the camera distance, or pixel size of the object. Two things happen here: on the one hand, the clusters are grouped or further subdivided based on their pixel size, and on the other hand, the triangles that make up these clusters are adjusted on the same basis. This ensures that if you get very close to an object, you will be shown the maximum polygonal Auflolution. At a greater distance, only what the pixels on the screen can show you is calculated and shown. This means advantages in both directions: One can display much higher auflsolution geometry in real time than ever before. Normal maps for details can be a thing of the past here. At greater distances, you even save power needed by the rendering engine to compute geometry that you may not be able to render pixel-wise.
Wow – first of all a whole bunch of almost unbelievable functionality. Here’s an attempt to put it all in perspective.
The previous Workflow with high-aufl solving geometry was to divide it into levels of detail based on screen size (the area of the screen the object occupies depending on distance). These were simply decimated versions of the original geometry and were automatically exchanged depending on the distance from the camera. However, this exchange of detail versions was perceptual. Moreover, even if the decimation of the geometry could be handled automatically by the Unreal Engine, a lot of manual work was often still necessary here to find the optimal setting for each object.
With Nanite, this all happens automatically. Either you decide directly during the import of the 3D model that it should become a “Nanite mesh”. Or with already existing assets, a right click in the Content Browser is enough to activate Nanite (furthermore, it is also possible in the Static Mesh Editor).
With Quixel Brigde in the bag, I can’t help but follow my first instinct: Set Import Settings in Quixel Bridge to “Nanite” to use the highest resolution of the photo-scanned objects and place them without worrying about polycount or performance. Then select the “Nanite Visualization” in “View Mode” and lean back in front of the screen while marveling, smiling through a sea of colorful, dancing triangles.
Of course, for all the fascination here, there are limitations and drawbacks. Without giving a complete list, Nanite does NOT support the following: skeletal meshes, statted characters.
(rigged characters), static lighting (via lightmaps), morph targets, spline meshes, deformation by materials (e.g. World Position Offset) and all materials that are not “opaque” (i.e. covering) and unfortunately also stereo rendering (i.e. VR).
In real projects you will work with a mix of Nanite and traditional Workflows, which seems to be the intention.
Lumen in Unreal Engine 5

Lumen also excited me from the first tech demo. Here, partly already known software tricks are combined with new techniques to implement a unified system for dynamic lighting and real-time reflections. The focus here is clearly on the dynamic factor, lights and objects can be movable, everything is supposed to interact with each other with light, shadows and reflexions in real time. This has never been possible in this form before. Because to ensure this, you have to trace the path of each ray of light, where it hits, bounces off, to hit again somewhere else, and so on. The classic path tracing as known and used from Offline renderers. Except that individual images have seconds, minutes or even hours to do all the calculations for this. The Unreal Engine wants to make this possible 30, 60 or even more times per second.
Here is quite true to the well-known saying “Fake it, ’til you make it.” is worked.
Light beams are not calculated based on the entire geometry, which may have grown in complexity many times over in connection with Nanite, but rather approximations are made.
One way to do this is to use “mesh distance fields,” a volume texture for each object that describes the distance from each point on the mesh to the next point in the volume. This allows parts of the calculation to be based on a two-dimensional texture, which of course saves an enormous amount of money. This part of the Lumen technology could already be used in a slightly different form in Unreal Engine 4. The whole thing was called “Distance Field Shadows” and was used in Fortnite, among other things, to reduce performance requirements for mobile devices.
For the Reflexionen, among other things, the “Surface Cache” is used, an approximation of the real geometry based on three-dimensional maps. This is used to compute reflections for surfaces that are not accessible to the camera.
These two techniques combined with screen-based effects, such as screen-space reflections, etc., and also (when enabled) with common ray-tracing technology (with supported grafik cards) enables enormously realistic and high-performance real-time applications.
In addition to Lumen, Nanite also relies heavily on streaming, i.e. loading data when it is needed, and thus profits enormously from fast storage, such as PCI Express SSDs. The application is clearly aimed at the latest generation of gaming PCs and consoles. Although, for example, hardware ray tracing would not necessarily have to be used, and thus the hardware requirement could be lowered, the constant loading and discarding of the currently required data places demands on a fast memory structure.
Here, too, it is a good idea to try out what is possible. Since dynamic lighting with luminous materials is now also possible, you can now also light up your scene with glowing spheres, light bulbs, or anything else you can think of. Simply using the keyboard shortcut “Ctrl+L” and moving the mouse to dynamically adjust the position of the sun and seeing light and shadow fall on the scene in real time is simply breathtaking.
Unreal Engine 5: Just give it a try

Unreal Engine 5 can be easily downloaded and installed via the Epic Games Launcher. I recommend the download to everyone, just to get your hands a little bit virtually dirty.
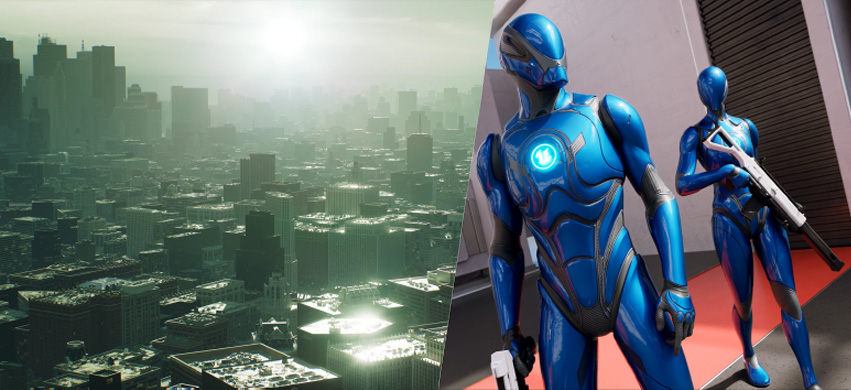
If building your own scene is too much work for you, I recommend downloading the “City Sample”, which was made available for free in the course of the Unreal Engine 5 release. This is a 4 km² procedurally generated city, which was created as part of an advertising campaign for the current Matrix Ressurections. The interactive tech demo (a mini-open-world game, so to speak) “Matrix Awakens” that was created for this purpose could previously be downloaded and played for free on the current consoles. Now the entire project data has been made available for free. Epic Games has once again managed to make even seasoned, long-time developers’ jaws drop when Epic released the tech demo and accompanying Youtube video. Using Houdini and working with the team at SideFX to generate the city and procedurally place buildings, as well as bring traffic and crowds to life based on a newly developed artificial intelligence, is just a fraction of the stunning tech on hand. Of course, all characters are “metahumans”, a platform specially developed by Epic Games to create digital humans. Going into this would fill another blog article. All of the geometry of the city, vehicles and other objects use Nanite, of course, as much as possible. This allowed the developers to fill, for example, only a small, repeatedly used part of the sidewalk with about 500,000 polygons. Some of the proportions are simply incredible.
For lighting and reflections, the developers relied on lumens. Here, too, it became apparent in the course of development, more or less by accident, that the illumination of the windows and street lamps (all luminous materials) alone was sufficient to light up the scene. So, without further ado, a night mode was built in, which mainly uses these lighting sources.
This, as well as various visualizations of Nanite, can still be changed and displayed during use via a menu.
Another valuable resource is the completely revised “Content Examples”. Here, divided into different levels, you will find many different examples of how you can use and apply the new and old technologies. Here, too, you can help yourself freely and use the content in this way or in modified form in your own projects.
Furthermore, “Project Lyra” should not be left unmentioned. This is another demo project, which was made available as part of the Unreal Engine 5 release. Lyra is a multiplayer shooter game (a nice throwback to the origins of the Unreal Engine) that uses advanced gameplay mechanics, procedurally generated geometry and the Epic Online Services, and has neatly documented implementations. One can start the game within the project and be automatically connected to other users around the world for a multiplayer session. This has not existed in this form before.
In addition, you can now find an extra category in the Unreal Engine Marketplace for products that are compatible with Unreal Engine 5.
No matter what you’re in the mood for, you can find a good starting point for almost anything to take your first steps in Unreal Engine 5.
Unreal Engine 5: My conclusion
There are so many more features that could be reported on, but which would go into so much depth that it would be worth starting a separate article for them. For example, the possibility to display 2D and 3D fluid simulations via Niagara particle systems. That means real smoke and fluid simulations in real time, which you can create directly in the Unreal Engine. It’s just so much fun to look at everything, to try out new, groundbreaking technologies with such a low barrier to entry, and to revel in dreams and plans of what you could do with them.
In closing, all I can say in the direction of Epic Games is “Mind blown, thank you!”
Contact

"*" indicates required fields
